Wednesday, February 23, 2011

Chakkarai Pongal (Sweet Rice Lentil Pudding)

Feb 23rd 2011

It is only as you grow older that you celebrate festivals because they signify something or because you want your children to learn some traditions. When I was younger, festivals were always about holidays from school, yummy food, great TV programs and new clothes in some cases.

Pongal or Indian Thanksgiving is the first festival of the year. There is a popular saying in Tamil -" Thai poranthal Vazhi porakkum" translated to "When this month arrives, an opportunity is born for everything". Such is the significance of this festival and this month. We celebrate Pongal on 3 days - Bhogi, Thai Pongal and Kaanum Pongal.

Coming to this dish, "Chakkarai" translates to "sugar" in Tamil. This is made on the second day - on Thai Pongal. It is the accompaniment to its salty companion - Venn Pongal. It is made only during Pongal or when I really ask my mom for some or during other special occasions. It is served as prasadam in many a temple. Without further ado, here is the recipe for this dish that is rich and unparalleled.


Difficulty Level: Medium


Time: Prep Time (20 min), Making time (15 min)

Ingredients

  • Raw rice or Long grain rice  1 cup  [ Do not use Basmati or Jasmine Rice]
  • Dry roasted Moong Dal - 1/2 cup
  • Jaggery - 3 cups 
  • Water

To season
  • Ghee - as much as you like :)
  • Cardamom powder - 2 tsps
  • Jadhikka or Nutmeg powder ( best to crush a fresh one) - 3 tsps
  • Cashews - 1 tbsp
  • Raisins - 1 tbsp or lesser (Optional)
  • Borneo- Camphor or Pachai Karpooram ( 1-2 small pieces)

Method de Preparation
  1. Dry roast moong dal so that the raw smell goes away and it becomes slightly brown.
  2. In a pressure cooker boil the rice and moong dhal with 2 and half cups of water. Add a spoon of ghee for smell and taste. Allow to cook well or equivalent of 3 whistles.
  3. Take the jaggery in a vessel and soak in water just sufficient to immerse it. Turn on heat and start to melt it. If jaggery is in blocks, pound and powder some or break into smaller pieces. If you use too much water, your pongal will end up being too liquid.
  4. Turn on heat and allow to boil till jaggery melts. Depending on the quality of your jaggery you might need to decant it to remove impurities. Most imported varieties don't have any.
  5. As the decanted or non-decanted jaggery solution boils, add the camphor to it. Allow to boil and thicken.
  6. Add the cooked rice+dal mixture to this and allow everything to come together. Add a few tbsps of ghee.
  7. Once desired consistency is reached ( like a porridge) turn off heat and add Cardamom powder.
  8. Take ghee in another small vessel for seasoning and in it fry cashewnuts and raisins, add the nutmeg powder. Empty this into the first mixture and add a few more tbsps of ghee. 
  9. Serve hot even as the main dish, I won't complain :D

Tips:
  1. The Jaggery used for this dish should be dark brown in color for the best taste. Most imported varieties are milder and light brown in color and don't taste as sweet. So go ahead and use 3 1/2 cups if needed.
  2. Brown sugar can be used instead of jaggery when not available and tastes moderately good but it cannot compete with the former.
  3. The camphor and nutmeg give it a unique taste that you get in most temples, so use it if you can.
  4. This is a recipe where more the ghee the better. For that matter for any recipe that calls for ghee, that is the case :D. If ghee used was not enough, you can add more when serving.

Confessions:
When possible I use jaggery from India. I need to decant it but the taste is much better and the color is a dark brown. For this batch I have used jaggery available here and you can see  it is not as brown as this dish is traditionally.


Monday, February 14, 2011

Kulfi

Feb 14th 2011


This is an Indian ice-cream that is rich and delicious. It is famously served in a conical shape and gets it from the container it is made to solidify in.  However it tastes just as good in any shape and any flavor :)


Famous Kulfi flavors are Malai, Mango and Pistachio but this recipe is just for the simple yet subtle Kesar Kulfi.


And strange as it might sound I had my first Kulfi here in the US and not in India. I have not been a big fan of ice-cream anyway because there are so many amazing Indian desserts that I rate way superior than regular cakes and ice-creams. However that is where the kulfi is different. This is tightly packed and tastes thicker than an ice-cream closer to a Basundi or Rabri. So this qualifies in my book as a sweet too!

Difficulty level : Easier than Easy

Time: 15 min (making time) 8 hrs (waiting time)

Ingredients:
  • Condensed Milk sweetened - 1 can
  • Evaporated Milk - 1 can
  • Cool Whip - 8 oz
  • Pistachio - 1/2 cup (non-salted)
  • Almonds - 1/4 cup (optional)
  • Kesar - few strands (maybe 1/2 tsp)


Method de Preparation:

  1. Take the nuts and blend in blender.
  2. Add the other ingredients, blend together, pour in a container or kulfi moulds and freeze overnight or for about 8 hrs or so.
  3. What else is left, take and eat :)

Source: From someone who innovates a lot in the kitchen - my friend Prakash from Nashville. 


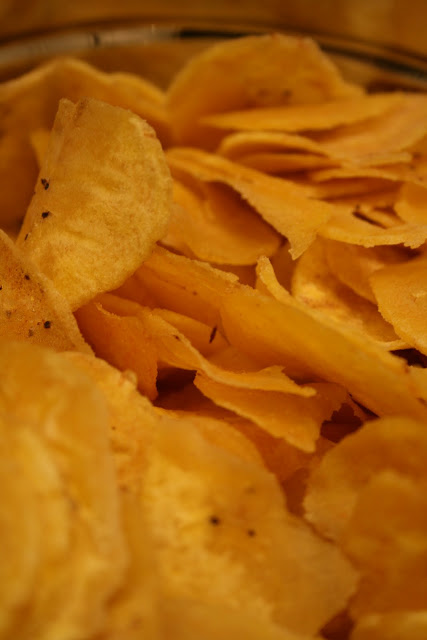
Nenthrangai Chips (Plantain chips)

Feb 14th 2011

Disclaimer: Fried foods may not be good for your waistline but so heavenly for your taste buds. Lays' commercial tagline "No one can stop at one" should not be followed here. Consumer discretion is advised.

Hailing from Palakkad is not a prerequisite for you to love these chips. Just trying one is enough :)

The Plantain is a fruit that be used in so many ways. In its raw form it can be used to make chips. When it is ripe, it can be dipped in dough and fried to make bajjis, boiled and eaten as such, or used in curries/soups.

I learnt this recipe from my mother in law and I have to say this produces some of the best chips I have ever tasted. If you are lucky to be in Chennai and you are craving these, here are some places you can buy them at too. I rank Hot Chips #2 as mine would be #1 :D

Difficulty level : Medium - Hard

Time: 45 min - 1 hr

Ingredients:
  • Raw plantain (green in color) - 3-4 nos
  • Salt
  • Water
  • Oil to fry

Method de Preparation:
  1. Take oil in a frying pan (to deep fry) and turn on heat.
  2. Wear gloves, take each plantain and draw vertical lines on it with a knife, meaning slicing through the skin, not into the flesh.
  3. Once you chop off the corners, peel the skin using the serrations you have made. Using gloves allows your fingers to not get blackened or itchy.
  4. Soak peeled plantain in water, keep immersed.
  5. Take 1/3 cup of water and dissolve 2-3 tbsp of salt in it. Keep aside.
  6. Once the oil is hot enough, take one banana out, wipe dry using a towel. Take a grater/slicer and slice round pieces directly into the hot oil.
  7. Once you have sliced enough, add 2-3 spoons of the water+salt combo into the oil. I promise it will sputter and hiss but that is it, nothing else will happen!
  8. When fried well enough (the oil will stop bubbling and become silent - no hissing) immediately take the chips out and if you wait any longer your chips will be burnt!
  9. Take the first batch out, taste for salt (that is what the salt/water mix is for). If you need more, add in the next batch and keep repeating.
  10. Drain oil in a towel and store in an airtight container. Does not spoil for a month or more but most likely will be consumed within a day or two :)

Tips:
  1. Don't add the salt separately in the end, it will not meld with the chips and will taste separate.
  2. Keep the heat in the oil constant, sometimes you might need to wait in between batches allowing it to reheat so the temperature is the same throughout.
  3. Start with just 1-2 plantains if you want to try it out, but since this is a bit cumbersome I suggest making more and storing next time around.


Monday, February 7, 2011

Beans Koshambari (Bean Lentil Salad)


Feb 7th 2011

Don't you just love love the Wikipedia...where you can get a quick understanding for almost everything? I even used it as a reference in one of my journal publications and that did not go too well with my professor. Well, maybe I went a bit too far. But seriously you just have to google anything and the Wiki has a quick intro which is almost 99% accurate.

Getting to the topic of this post, the Koshambari is a salad from Karnataka that I don't need to give a recipe for because the Wiki has that too, sigh :) 

I like it because it is easy to make, very high in protein and wonderful for kids to munch on too! 

Difficulty level : Easy 

Time:  1 hr (Prep time), 10 min (Making time)

Ingredients
  • 2 cups beans (chopped finely) 
  • 1 cup moong dal (soaked for 1/2 hr and then drained and kept aside for 1/2 hr)
  • salt to taste
    To Temper
    • tbsp urad dhal
    • tbsp coconut (optional)
    • 3-4 green chillies
    • 1 tbsp mustard

    Method de Preparation
    1. Chop beans very finely and keep aside.
    2. Soak moong dhal for 1/2 hr and then drain the water out. Keep aside for about 1/2 hr till it is soft and can be eaten as is.
    3. Take oil in a pan, put the ingredients to temper, add the beans and saute for a couple of min and then mix with the moong dhal.
    4. Add salt to taste and it is done done done :)

    Options: You can replace beans with carrot, cucumber etc. And u can use red chillies instead of green chillies too, and totally skip the coconut if you like.


    Related Posts with Thumbnails