Showing posts with label snacks. Show all posts

Tuesday, August 2, 2011

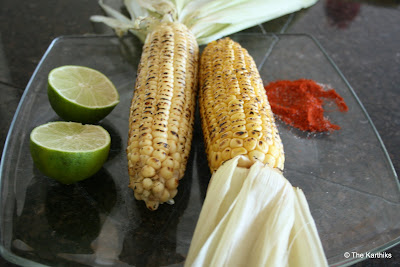
Cholam (Corn on the Cob Indian Style)

If you have grown up in India and in any of the coastal regions like Chennai or Mumbai you could not have missed this delicacy that is a staple on the beachside. It is a totally different story that growing up I have never been allowed to eat much street food due to my dad being a medical doctor and hygiene issues. I wish I could reverse that now. I have tried to compensate for that once I got to college and he has also become increasingly lenient with the confidence that an Andial can end *whatever* should it arise.

To more pleasant things now. I have had an electric stove top until 2 years ago and just could not get this to grill effectively. The past two years since having a gas stove top; we make this regularly every summer when fresh corn is in galore. This is so simple to make, such a nutritious snack and can be modified for kids and adults alike by varying what spices you would use.

Time: 10 min

Difficulty level : Easy

Ingredients:
  • Corn ( as many as you would like)
  • lime juice or lime (cut into 2 halves)
  • 1 tbsp chilly powder 
  • 1 tsp salt

Method de Preparation:
  1.  Peel the cover of the corn but don't take it away. You will be grilling it using that to hold. Just fold it backwards.
  2. Remove all the tender husk and string like fabric.
  3. Turn your gas stove top on and move corn back and forth on the fire. Keep rotating it so all sides are exposed to the heat.
  4. You might hear a few corn crackle. That is expected. How would you feel if you were held to the flame - I expect you would crackle too, right?
  5. Keep going until you can see it brown/blacken. Depending on how dark you want it, turn off heat and keep this aside.
  6. In the meantime mix together the chilly powder and salt. Cut the lime in two halves. 
  7. Now for the fun part. Take the corn in your left hand (yes, even if you are left handed), and take the lime half in your right hand. Dip that lime (the cut side of course) into that chilly salt mix. Get a good amount on it. Then apply it along the length of the corn squeezing the lime along the way so that the juice also enters the grooves. Repeat till the corn is covered. For kids, omit the chilly salt mix and use butter and some salt instead.
  8. Now grab your favorite book, go to a secret spot in your home and enjoy. I say secret spot because there will be these people who always say no when you ask them if they want one and that they will have just a bite. Beware that after they try it, a bite is all that will be left for you!

Modifications:
If you have a grill, by all means use that instead of doing this on the stove top. But cooking on that flame gives it a unique taste too.


Tuesday, May 17, 2011

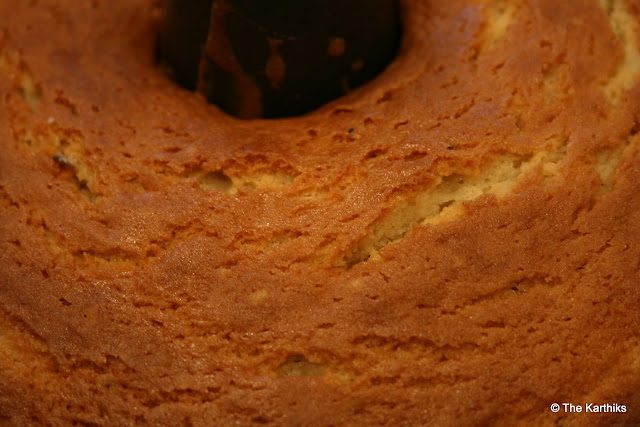
Coffee Cake

May 17th 2011

You know usually when you invite friends over it means work. But when you have friends like mine - Krupa Sharath especially, I love it because she usually comes over with a new dish. And this is how I got to try this super duper coffee cake. It is so moist, it melts in your mouth. And the cinnamon and pecans - oh yum! 

I challenge you to make this and just stop at one piece. And though it says coffee cake, it goes perfectly well with coffee, tea or just on its own. It should be made in a fluted tube or a  bundt pan, but I only had this from when I made a marble cake, so this worked too :)

Time: Preparation Time ( 20 min), Cooking Time ( 60-70 min)

Difficulty Level: Easy

Ingredients:
  • 1 1/2 cups granulated sugar
  • 3/4 cup butter or margarine, softened
  • 1 teaspoon vanilla
  • 2 eggs
  • 2 cups flour
  • 1 teaspoon Baking Powder
  • 1/2 teaspoon baking soda
  • 1 cup good quality Sour Cream
  • 2 cup chopped Pecans
  • 2/3 cup firmly packed brown sugar
  • 2 teaspoons ground cinnamon

Method de Preparation:
  1. Preheat oven to 350 degrees F. Beat granulated sugar, butter and vanilla in large bowl with electric mixer on medium speed until light and fluffy. Add eggs, 1 at a time, beating well after each addition. Mix flour, baking powder and baking soda. Add to sugar mixture alternately with sour cream, beating until well blended after each addition.
  2. Mix pecans, brown sugar and cinnamon. Spoon half of the pecan mixture into greased 12-cup fluted tube pan or 10-inch tube pan; top with half of the cake batter. Repeat layers.
  3. Bake 55 minutes to 1 hour or until toothpick inserted in center comes out clean. Cool 10 minutes on wire rack. Loosen cake from side of pan with spatula or knife. Invert cake onto wire rack; gently remove pan. Cool completely.

Confessions:
  • I was super excited to see how this cake came out and once I saw the top of it (which unfortunately will become the bottom), I hurried to take it out. PLEASE WAIT!! Allow it to cool completely else your cake will break, especially since at the bottom you have the pecan-brown sugar mix that will stick to the pan.  If you are a good cook does not mean one always follow instructions, we are impatient too :D
  • Also I have doubled the amount of that filling because I felt the one with the original recipe it was not quite enough. However if you are the kind that does not like this too much, then stick to a little lesser quantity of pecans and brown sugar.

Source: Krupa Sharath - who in turn got it from here at allrecipes.com. Off late I have come to use this site a lot. Really nice recipes with a lot of reviews too.


Monday, February 14, 2011

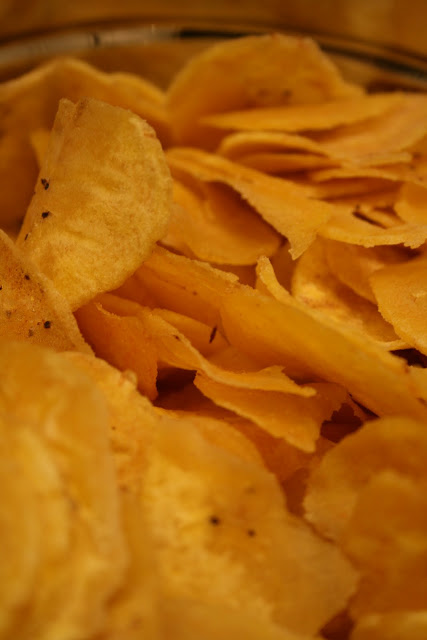
Nenthrangai Chips (Plantain chips)

Feb 14th 2011

Disclaimer: Fried foods may not be good for your waistline but so heavenly for your taste buds. Lays' commercial tagline "No one can stop at one" should not be followed here. Consumer discretion is advised.

Hailing from Palakkad is not a prerequisite for you to love these chips. Just trying one is enough :)

The Plantain is a fruit that be used in so many ways. In its raw form it can be used to make chips. When it is ripe, it can be dipped in dough and fried to make bajjis, boiled and eaten as such, or used in curries/soups.

I learnt this recipe from my mother in law and I have to say this produces some of the best chips I have ever tasted. If you are lucky to be in Chennai and you are craving these, here are some places you can buy them at too. I rank Hot Chips #2 as mine would be #1 :D

Difficulty level : Medium - Hard

Time: 45 min - 1 hr

Ingredients:
  • Raw plantain (green in color) - 3-4 nos
  • Salt
  • Water
  • Oil to fry

Method de Preparation:
  1. Take oil in a frying pan (to deep fry) and turn on heat.
  2. Wear gloves, take each plantain and draw vertical lines on it with a knife, meaning slicing through the skin, not into the flesh.
  3. Once you chop off the corners, peel the skin using the serrations you have made. Using gloves allows your fingers to not get blackened or itchy.
  4. Soak peeled plantain in water, keep immersed.
  5. Take 1/3 cup of water and dissolve 2-3 tbsp of salt in it. Keep aside.
  6. Once the oil is hot enough, take one banana out, wipe dry using a towel. Take a grater/slicer and slice round pieces directly into the hot oil.
  7. Once you have sliced enough, add 2-3 spoons of the water+salt combo into the oil. I promise it will sputter and hiss but that is it, nothing else will happen!
  8. When fried well enough (the oil will stop bubbling and become silent - no hissing) immediately take the chips out and if you wait any longer your chips will be burnt!
  9. Take the first batch out, taste for salt (that is what the salt/water mix is for). If you need more, add in the next batch and keep repeating.
  10. Drain oil in a towel and store in an airtight container. Does not spoil for a month or more but most likely will be consumed within a day or two :)

Tips:
  1. Don't add the salt separately in the end, it will not meld with the chips and will taste separate.
  2. Keep the heat in the oil constant, sometimes you might need to wait in between batches allowing it to reheat so the temperature is the same throughout.
  3. Start with just 1-2 plantains if you want to try it out, but since this is a bit cumbersome I suggest making more and storing next time around.


Wednesday, May 26, 2010

Mozzarella Tomato-Basil Panini


May 26th 2010

If you don't know by now I absolutely love my Panini Maker and put it to good use. It is one of the purchases in my kitchen that I can say I use very regularly. This combination of frezh mozzarella cheese and tomatoes in a basil-olive oil sauce is divine. And the great part about these sandwiches is they can be assembled ahead of time and just grilled in time for a party or in the morning for lunch. If you do not have a panini maker, these can be done on the stove top too on a pan.

Difficulty level : Easy

Time:  15 min 

Ingredients
  • Mozzarella cheese cut in slices (~ 2 or 3 per panini)
  • chopped fresh basil ( 1 or 2 tbsps)
  • olive oil ( per liking) - 4 or 5 tbsps
  • Tomatoes cut in slices (~ 2 or 3 per panini)
  • pepper (optional)
  • Bread slices (2 per panini)
Method de Preparation
  1. Mix the half the olive oil and the basil in a cup and keep aside.
  2. Lightly spread plain olive oil on one side of each bread slice, just a bit.
  3. On the same bread slice, on the other side, spread this olive oil and basil mix. So you will have for each panini, two bread slices with plain olive oil on the outside and the olive oil and basil mix on the inside.
  4. To assemble each panini,  stack bread, tomato and the mozzarella and the other bread slice. Throw in some fresh ground pepper if you like (optional).
  5. And put in the panini maker, assembling your other sandwiches in the meantime.
  6. Take out and serve with ketchup or just plain. 
  7. This would go nicely with a fresh side salad and you have dinner and if you have any leftovers lunch also taken care of.
Variations: You could use shredded mozzarella but the chewy texture of the slices would be lost.


Wednesday, May 19, 2010

Tomato Thokku Grilled Cheese Sandwich

May 18th 2010

This is a really quick snack that can be made within a few mintues when you already have this Tomato thokku in the refrigerator.  This is perfect for those afternoons or evenings when you want to munch on something but don't want to spend too much time in making a snack. 

Difficulty level : Easy

Time: 10 min

Ingredients
  • Tomato Thokku (Chutney) - 1 tbsp
  • 2 slices of bread
  • 1 slice cheese or 2 if you really want to
  • Oil or butter (to spread)
Method de Preparation
  1. Heat a flat pan and spread the oil or butter lightly on both sides of each bread and put it to toast.
  2. When one side is slightly browning, smear the paste on one silce and put the cheese on top of it.
  3. Finally complete by placing the other bread slice on top.
  4. Flip a couple of time till the bread is toasted and the cheese inside is melted.
  5. Cut into triangles and serve immediately.
Confessions:  I know this is not the best picture. One - we ate the first one too fast before we could take a picture so the plate is ahem not so great and Two- you have to use the flash when you eat a snack at an ungodly hour now don't you, the sun can't shine to your whims and fancies!  

Variations:  You could toast the bread in the toaster, and then spread the butter and the thokku and the cheese but it just would not be same. So go ahead and spend the 5 min its takes!  


Monday, February 8, 2010

Oats Dosa (Crepe)

Feb 8th 2010

This dosa can be made paper thin like regular dosas or a slightly thicker version with veggies like adais. A sneaky way to get kids to eat oats, a better option than white rice. And another great perk with this recipe is that you don't need to wait for the batter to ferment. Dosa can be made the same day the batter is made.

Difficulty level: Easy

Preparation Time: 6 hrs soaking time, 2 mins per dosa

Ingredients:
Method de Preparation

  1. Soak the oats and urad dhal separately, immersed in water for 6 hrs.
  2. Grind separately in the blender and then blend once all together. Grind well.
  3. Add required salt and water to bring to the consistency of maybe a pancake syrup or regular dosa batter.
  4. Heat pan and pour batter in the center and spread out in a circle using the ladle.
  5. Add a little bit of oil ( 1/2 tsp) on each side, spread over the dosa.
  6. Garama Garam Dosa is ready.
  7. Goes with any chutney on the side, we had ours with tomato thokku (pickle/chutney) and Bell pepper (capsicum) thogayal (chutney).
Source: my friend Kavitha


Friday, December 4, 2009

Banana Bread

Dec 4th 2009

This is one of the easiest things I have baked, and tastes wonderful. This is an especially good snack for afternoons when you want to munch on something and nothing is around. And the reason I so love this dish is because you get to use the really ripe bananas that you actually don't like to eat. The recipe is from " The Los Angeles time California cookbook".


Difficulty level: Easy (Novice Baker)


Preparation Time: 10 min ( preparation), baking time (50 min or 25 min)


Ingredients: 

  • 2 cups mashed banana (ripe ones work best)
  • 3 eggs
  • 1 cup oil
  • 1 tsp vanilla
  • 2 cups flour
  • 1 cup sugar
  • 1 tsp soda
  • 1/4 tsp salt
Method de Preparation:
  1. Combine banana, eggs, oil and vanilla and mix well.
  2. Sift together flour, sugar, soda and salt and add to the banana mixture. ( I usually just mix them well, have never sifted :) )
  3. If you like nuts, add finely chopped walnuts.
  4. Pour batter into greased and wax-paper-lined 9x5 inch loaf pan.
  5. Bake at 350 degrees 50 min or until done. Or fill greased muffin pans 3/4 full and bake at 350 degrees 25 minutes.


Monday, November 2, 2009

Food for a Rainy day

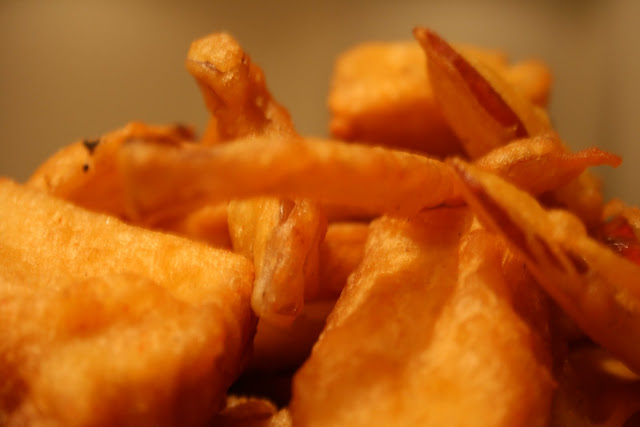
If there is one thing the weather in Portland is conducive for, it certainly will be bajjis and pakoras :) Every time when I look at the overcast sky and the dark clouds, and feel cold in the 50 degree weather K and I look at each other thinking the same thoughts. However if my wishes came true too often, our cholesterol levels would be not liking it too much.

However this was one such Saturday that we gave in. Here is the recipe I use. This allows for a crispy crust and one can use a variety of stuffing.

Ingredients

Maida 1 cup
Rice powder 2 cup
Bengal gram powder (kadala maavu) 1 cup
Cooking soda (sodium bicarbonate) 1/2 tbsp
Curd 1 tbsp
Salt, chilly power and asafetida
For the bajji: Capsicum, bread, paneer, banana (vazhakka), apple, brinjal, potato, onion, perkanga (ridge gourd), bajji molaga etc are some varieties of bajji can that be made.

Method

Mix all above and make into a paste (not too watery) –about the consistency of dosai maavu. Dip the item you want in it and fry in oil that is heated. Enjoy with a side of ketchup or chutney of your choice.

Tastes best snuggled in a sofa on a rainy day watching a movie :)


Thursday, May 14, 2009

Kai Murukku

I have always been driven to try things that are labeled hard or difficult to make as far as cooking goes.  I get a wonderful warm feeling when that does end up coming out successful :) I wish the same motivation applied when it came to work, ha..not a chance!

So this has been on my list of things for a long long time and finally I convinced my mother in law that we should try it and here is my attempt. She made the dough though from where the murukkus came. I have to admit it was not an easy task and requires repeated practice to get proficient I would think. I was happy though with results for a first time.


Me hard at work :)

One of my better ones


All done, we were generous with the seasame seeds


Related Posts with Thumbnails